 blog
blog
Budget Emergency Kits: Affordable Survival Gear Guide
Table of Contents
- Why Affordable Pricing and High-Quality Gear Aren't Mutually Exclusive
- Essential Items for a Budget-Friendly Emergency Kit
- Affordable First Aid Kits for Home: What to Look For
- DIY Emergency Kit Checklist: Build vs. Buy
- Emergency Preparedness Supply Cost Guide: Budgeting by Category
- Quality Verification: How to Spot Durable Equipment vs. Cheap Alternatives
- Scalable Preparedness: Building Your Kit in Phases
- Conclusion
- Frequently Asked Questions
Last Updated: September 27, 2026
Why Affordable Pricing and High-Quality Gear Aren't Mutually Exclusive
The biggest myth about budget emergency kits is that a dependable one requires a second mortgage. The truth is simpler: affordable pricing and high-quality products can coexist when you know what actually matters. A budget emergency kit built around a few reliable core items will outperform an expensive pile of gimmicks every time. The real problem isn't cost.
Essential Items for a Budget-Friendly Emergency Kit
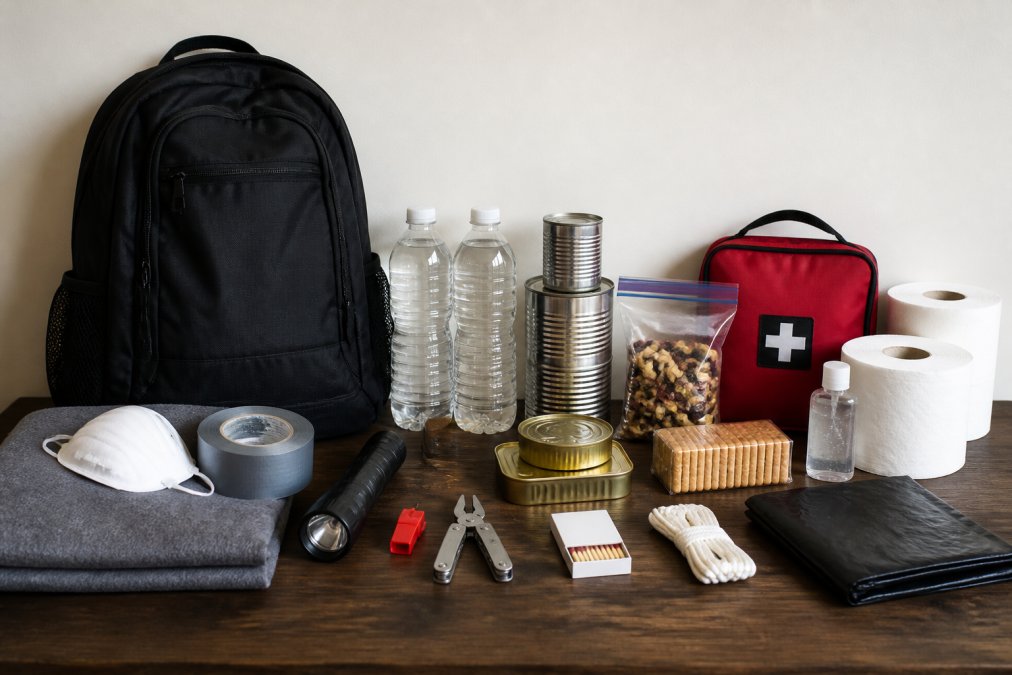
Every functional kit rests on three pillars: water, food, and shelter. Get these right and you've handled the most common emergencies.
Water, Food, and Shelter Essentials
Water comes first. FEMA's ready.gov guidance recommends at least one gallon per person per day for drinking and sanitation, with a three-day minimum for evacuation and a two-week supply for home. Don't buy bottled water only, add purification tablets or a filter so you can treat found water when your supply runs out.
Tools, Lighting, and Communication Gear
Lighting and communication are where cheap gear fails fastest. A multi-tool, a hand-crank or battery flashlight, and a battery-powered radio cover most scenarios. Test every battery device before it goes in the bag. A flashlight that dies in month two is worse than no flashlight, because you planned around it.
Affordable First Aid Kits for Home: What to Look For
The best affordable first aid kits for home are the ones you'll actually restock and check. Price matters less than contents and refillability.
Look for these in any kit:
- Assorted adhesive bandages in multiple sizes
- Sterile gauze pads and rolled gauze
- Medical tape and elastic wrap
- Antiseptic wipes and antibiotic ointment
- Nitrile gloves and a CPR face shield
- Trauma items such as a tourniquet and hemostatic dressing for serious bleeding
DIY Emergency Kit Checklist: Build vs. Buy
Building your own kit and buying a pre-made one both work. The right choice depends on your time, budget, and how much you want to customize.
- Water: one gallon per person per day, plus purification method
- Food: three days minimum of non-perishables
- First aid: bandages, gauze, antiseptic, gloves, trauma items
- Tools: multi-tool, duct tape, manual can opener
- Lighting: flashlight, headlamp, extra batteries
- Communication: battery radio, charged power bank
- Shelter: emergency blanket, tarp, poncho
- Hygiene: soap, hand sanitizer, toothbrush, feminine supplies
- Documents: copies of IDs and insurance in a waterproof bag
- Pet supplies: food, water, leash, and medication for each animal
When DIY Saves Money and When It Doesn't
DIY saves money when you already own basics and buy in bulk. It costs more when you chase specialty items one at a time at retail.
Emergency Preparedness Supply Cost Guide: Budgeting by Category
Most guides stop at the sticker price. The number that matters is cost-per-use, what you pay divided by how many times the item performs when you need it. A $4 flashlight that dies in storage costs more per use than a $30 flashlight that works for a decade, because the cheap one's only "use" is the failure that strands you.
| Category | Priority | Where to Save | Where to Spend | Why the Split Works |
|---|---|---|---|---|
| Water purification | High | Tablets as backup | A pump or gravity filter | Tablets are cheap insurance; the filter is what you rely on daily |
| First aid | High | Bandages, gauze, tape | Tourniquet, hemostatic dressing | Consumables get used and replaced; trauma items must not fail |
| Lighting | High | Spare batteries, a second cheap light | Primary flashlight or headlamp | Redundancy is cheap; your main light is not the place to gamble |
| Food | Medium | Canned goods, rice, oats | Long-term storage (freeze-dried, mylar) | Everyday staples rotate through your kitchen; storage food sits for years |
| Shelter | Medium | Ponchos, plastic sheeting | Emergency blankets, a real tarp | The tarp does the work; the poncho is a backup layer |
| Tools | Medium | Duct tape, manual can opener | Multi-tool, fixed-blade knife | Tape and openers are disposable; cutting tools are load-bearing |
The Cost-Per-Use Math
Run the numbers before you buy. A $40 water filter with a $15 annual cartridge costs $115 over five years. A $12 box of purification tablets treating the same volume for a year looks cheaper, until five years of tablets hit $60 and you add that tablets do nothing for sediment or chemical contamination. The filter wins on capability, not just longevity.
Where Bulk Buying Actually Pays
Bulk buying helps on consumables, not on durables.
- Consumables, bandages, gauze, antiseptic wipes, water tablets, batteries, food staples. Buying these in larger quantities lowers the per-unit price and you will use them eventually, in an emergency or in daily life.
- Durables, filters, flashlights, multi-tools, tarps, trauma items. Buying two cheap ones rarely beats buying one good one. Buy the good one once.
A practical rule: if the item expires, degrades, or gets consumed, buy in bulk. If the item is supposed to last years, buy the best version you can afford and stop shopping.
A Realistic Starter Budget
You don't need to fund the whole kit at once. A workable first phase, three days of water and food for one person, a basic first aid kit, one reliable light, and a way to treat water, can be assembled for the cost of a couple of restaurant meals if you buy consumables in bulk and spend deliberately on the two or three items that must work. The table above tells you which those are.
Quality Verification: How to Spot Durable Equipment vs. Cheap Alternatives
Durable equipment shares a few tells. Check them before buying anything you'll depend on.
- Materials: Look for reinforced stitching on bags and metal, not plastic, on critical tool parts.
- Ratings: Water filters carry micron ratings. A filter rated to 0.1 microns removes more than one rated to 1 micron.
- Certifications: First aid and safety gear often carries independent testing marks. Verify them.
- Warranty: A real warranty signals the maker stands behind the product.
- Reviews with detail: Skip star ratings. Read reviews that describe failure after months of use.
Scalable Preparedness: Building Your Kit in Phases
Most guides treat a budget kit and a high-quality kit as two different purchases. They are not. A budget kit is the first phase of the same kit, upgraded over time without throwing away what you already bought. That framework actually fits a real budget.
Phase 1, The 72-Hour Baseline
Goal: survive three days of disruption at home or during an evacuation.
- Water: one gallon per person per day, plus a cheap purification method (tablets)
- Food: three days of non-perishables you will actually eat
- First aid: a basic kit with bandages, gauze, antiseptic, gloves
- Light: one flashlight or headlamp plus spare batteries
- Shelter: an emergency blanket and a poncho
- Documents: copies of IDs and insurance in a waterproof bag
Phase 2, Extend to Two Weeks
Goal: handle a longer disruption without leaving home.
- Water: add a gravity or pump filter; keep tablets as backup
- Food: expand to two weeks; add a manual can opener if you do not have one
- Communication: battery or hand-crank radio, charged power bank
- Tools: multi-tool, duct tape, work gloves
- Hygiene: soap, hand sanitizer, toothbrushes, feminine supplies
- First aid: add a tourniquet and hemostatic dressing
The upgrade mechanic is replacement, not addition. When the filter arrives, the tablets move to backup; when the multi-tool arrives, the cheap pocket knife becomes a spare. You're not doubling your kit, you're promoting better gear into the primary role.
Phase 3, Long-Term and Specialized
Goal: sustain a household for weeks and cover the people and animals others forget.
- Food and water: bulk storage, rotation schedule, larger water reserve
- Power: solar charger or larger battery bank
- Shelter: a real tarp, sleeping bags rated for your climate
- Pet supplies: food, water, leash, medication for each animal
- Documents and cash: small bills, copies stored in a second location
How to Sequence Upgrades Without Overspending
A simple priority order keeps the budget honest:
- Water treatment, the item most likely to be needed and most likely to fail if cheap
- Primary light, you cannot work in the dark
- Trauma supplies, the items where failure is not recoverable
- Food depth, expand shelf life and quantity
- Comfort and specialization, tarps, sleeping bags, pet gear
Spend on the top of that list first; everything below can wait a month or a season. Phasing isn't about buying slowly, it's about making sure your money lands on the items that must not fail.
A budget emergency kits approach is not a compromise. It is Phase 1 of a kit you will upgrade for years. Buy consumables in bulk, buy durables once, and promote better gear into primary roles instead of replacing the whole bag. ::: Expanding your preparedness strategy to include a dedicated emergency medical kit ensures that every member of your household, including your canine companions, remains protected during an unexpected crisis.
Conclusion
The hard part of preparedness isn't money. It's deciding what to buy first and trusting that it will work. A phased plan built on verified, durable gear beats an expensive kit assembled in a panic.
Frequently Asked Questions
What are the essential items for a budget-friendly emergency kit?
Start with water (one gallon per person per day for three days), non-perishable food, a manual can opener, flashlight, battery-powered radio, first aid supplies, whistle, dust mask, plastic sheeting, and garbage bags. Add medications, multi-tool, fire starter, and survival blankets. Focus on items that address immediate survival needs first, then expand. A basic kit covering one person for 72 hours can be assembled affordably by prioritizing function over brand names.
Is it cheaper to buy a first aid kit or make your own?
Pre-made affordable first aid kits for home use often cost less than assembling individual components because manufacturers buy supplies in bulk. However, DIY lets you customize contents to your family's specific needs, like adding pet supplies or extra medications. For basic kits, buying pre-made usually saves money. For specialized or larger kits, DIY may offer better value. Compare contents carefully; some budget kits skimp on quality bandages or omit trauma supplies.
How do you identify high-quality survival gear versus cheap alternatives?
Check materials, construction, and warranties. High-quality gear uses durable materials like 600D polyester for bags, stainless steel for multi-tools, and waterproof casings for matches. Read reviews mentioning long-term use and failure points. Avoid gear with vague specifications or unusually low prices for complex items. Reputable brands publish testing standards and offer warranties. For emergency supplies, gear reliability matters more than saving a few dollars; a failed flashlight or leaking water container defeats the purpose.
How can I build an emergency kit on a tight budget without sacrificing quality?
Build in phases: start with water, food, and first aid, then add tools, shelter, and comfort items. Buy non-perishables in bulk during sales, rotate stock to avoid waste, and prioritize multi-use items like a multi-tool or paracord. Watch for price gouging during disaster seasons and stock up beforehand. Focus budget on items critical to survival; you can upgrade comfort items later. A phased approach spreads costs while maintaining readiness.